


Languages: English · Español · Português · 中文
Use Schedule Requests in the Healing Hands student portal to send the hours you are available for internship work at the clinic. You can select days, adjust your hours, review your request, and check the outcome after staff review it.
This guide covers the student portal in a desktop or mobile browser. The screenshots use sample availability and decisions. Your dates and request history will be different.
Submitting availability does not confirm a shift. Check the decision for each day and any granted hours before making plans to attend.
1. Open Schedule Requests
- Open the Healing Hands student portal in your browser and sign in with your student account.
- Find Schedule Requests on the dashboard.
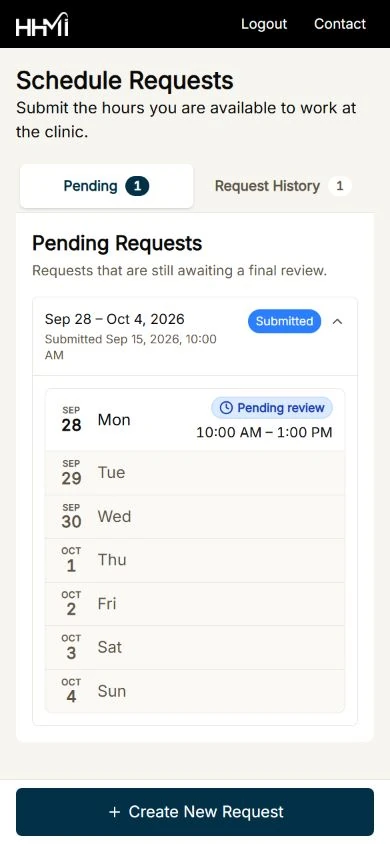
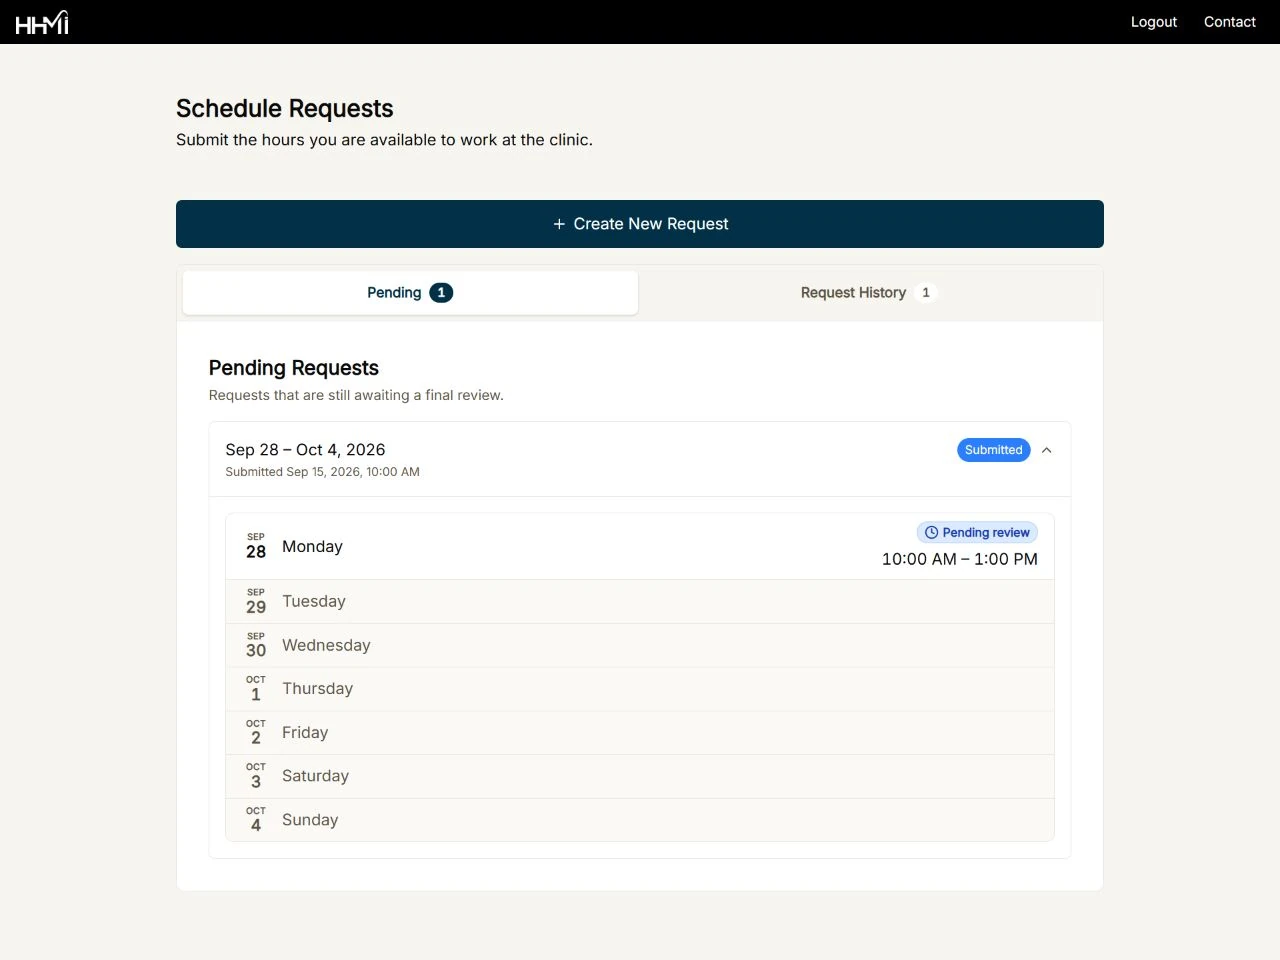
- Select Create New Request. On a desktop, this button is above the request list. On a phone, it stays at the bottom of the screen.
Access requires a student account linked to the clinic for internship scheduling. If the dashboard shows Coming soon, the feature has not yet been opened there. If you cannot access the page, contact Student Services for help.
2. Check the week
Read the Week of heading and date range at the top of the form. The form presents one Monday-through-Sunday week at a time, chosen automatically by the portal.
The cutoff is Monday at 6:00 PM in the clinic’s local time. Before that cutoff, the form shows the following week. At 6:00 PM and afterward, it moves to the week after that. Always use the dates displayed in the form when planning your request.
For example, before 6:00 PM on Monday, September 14, 2026, the form offers September 21 through September 27. From 6:00 PM that Monday, it offers September 28 through October 4.
3. Choose your days and hours
- Select the checkbox beside each day you are available.
- Move the left slider handle to set the start time and the right handle to set the end time.
- Check the time range printed beside the day. It updates as you move the handles.
- Leave days unchecked when you are not offering availability. Clear a checkbox to remove that day from this submission.
Each selected day must contain at least one hour of availability. The slider limits your choices to the clinic’s hours for that day and uses the clinic’s scheduling increments. Opening and closing times can differ by day. Check the displayed times instead of assuming every selected day starts with the hours you want.
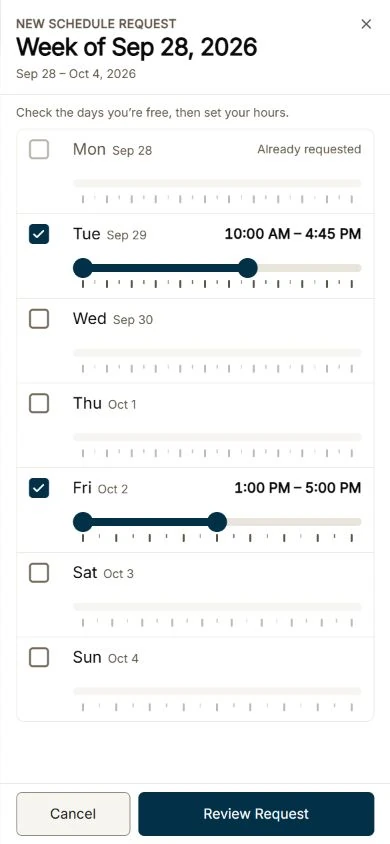
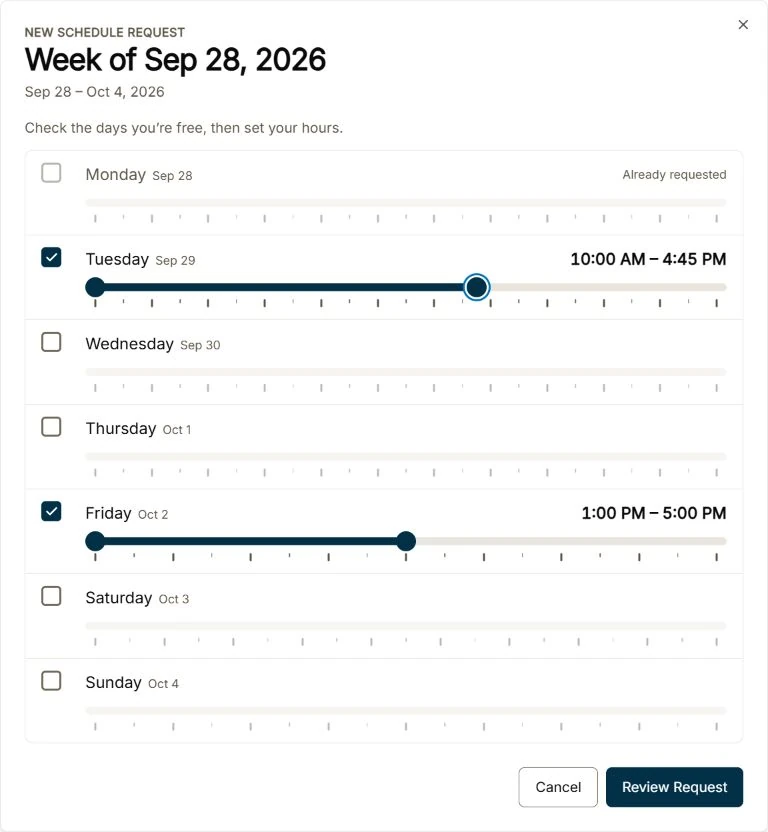
What does “Already requested” mean?
A date with submitted or approved availability cannot be requested again. Other available dates in the displayed week can still be selected. A denied or cancelled date becomes eligible again if it is still in the week offered by the form.
4. Review and submit
- Select Review Request.
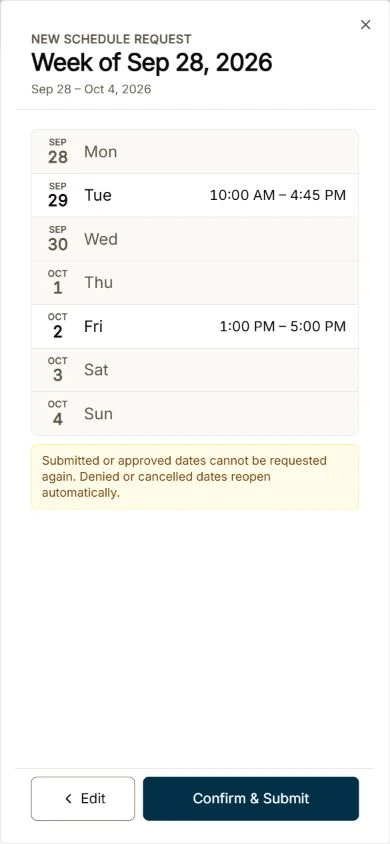
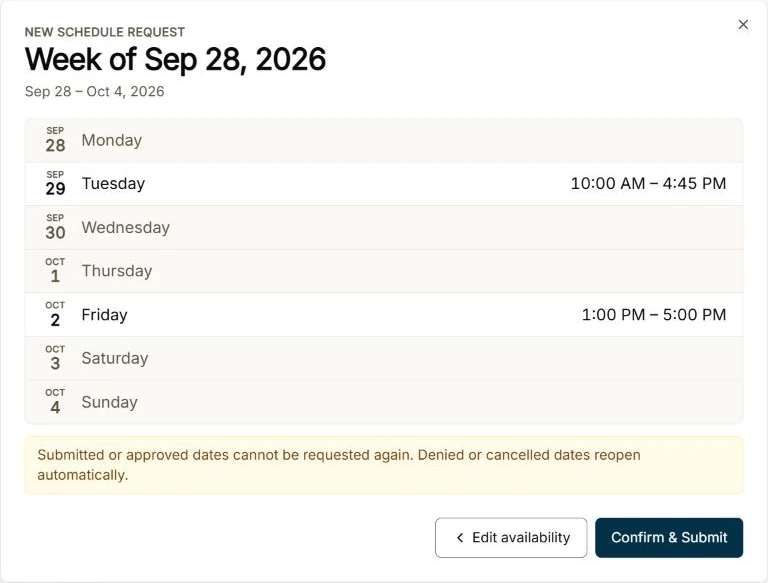
- Check the week, selected dates, and start and end times. The review lists only the availability you are about to send. Previously submitted dates are not added to this new submission.
- To make a correction, select Edit availability on a desktop or Edit on a phone.
- When the details are correct, select Confirm & Submit.
Review Request opens the confirmation step. It does not send your availability. After a successful submission, the portal returns to the request list and displays Availability submitted with a message that your request has been sent for review.
5. Check the decision for each day
Return to Schedule Requests to follow your availability:
- Pending: weeks with at least one day still awaiting review. Expand a week to read each day’s status. Some days may already have a decision while others remain pending.
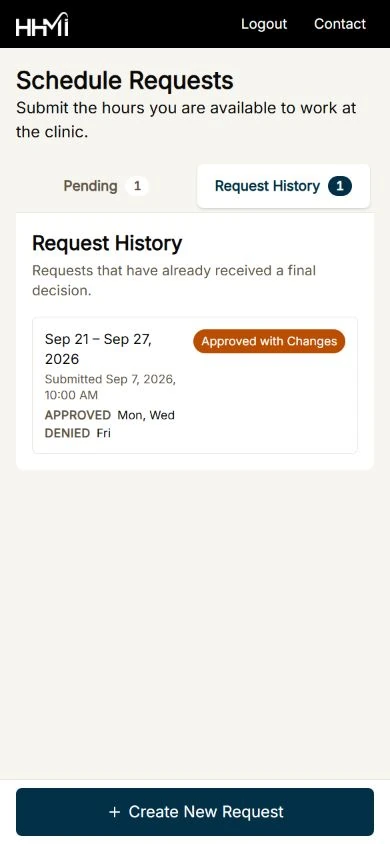
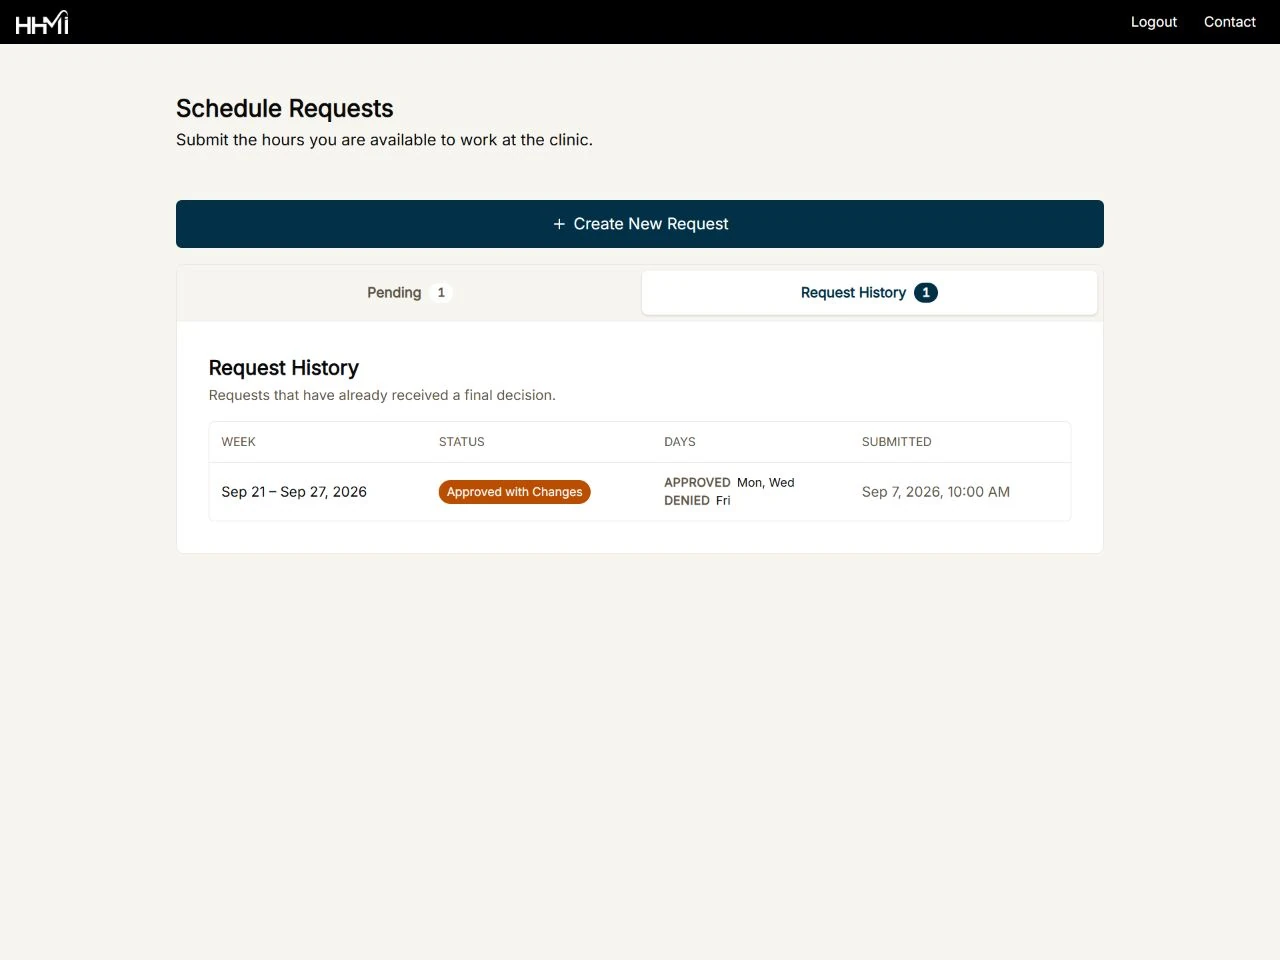
- Request History: weeks that have received their final decisions. Select a week to open its details. On a desktop, history appears in a table. On a phone, it appears as a list of cards.
The labels mean:
- Submitted / Pending review: your availability was received and is awaiting a decision.
- Approved: the availability was approved. Read the hours listed for that day.
- Approved with Changes: the week includes adjusted hours or a combination of approved and unapproved days. Open the details to see exactly what was granted.
- Denied: the requested availability was not approved.
- Cancelled: the availability item was cancelled.
When staff adjust an approved day, the details show Granted hours and the original Requested hours. Use the granted range for that day. Hours shown beside a denied or cancelled item are a record of the request, not an approved shift.
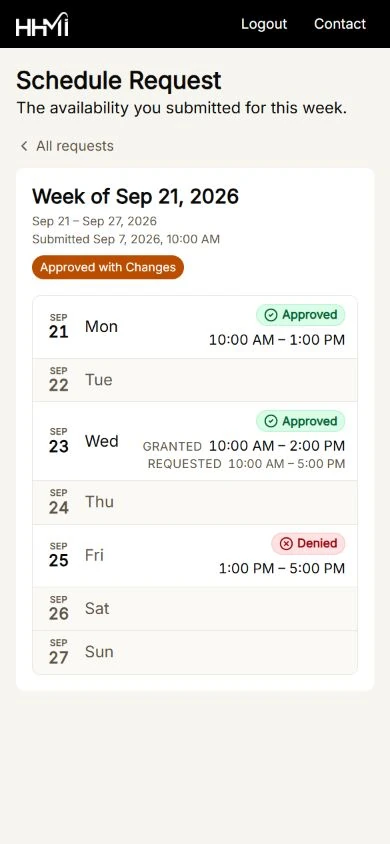
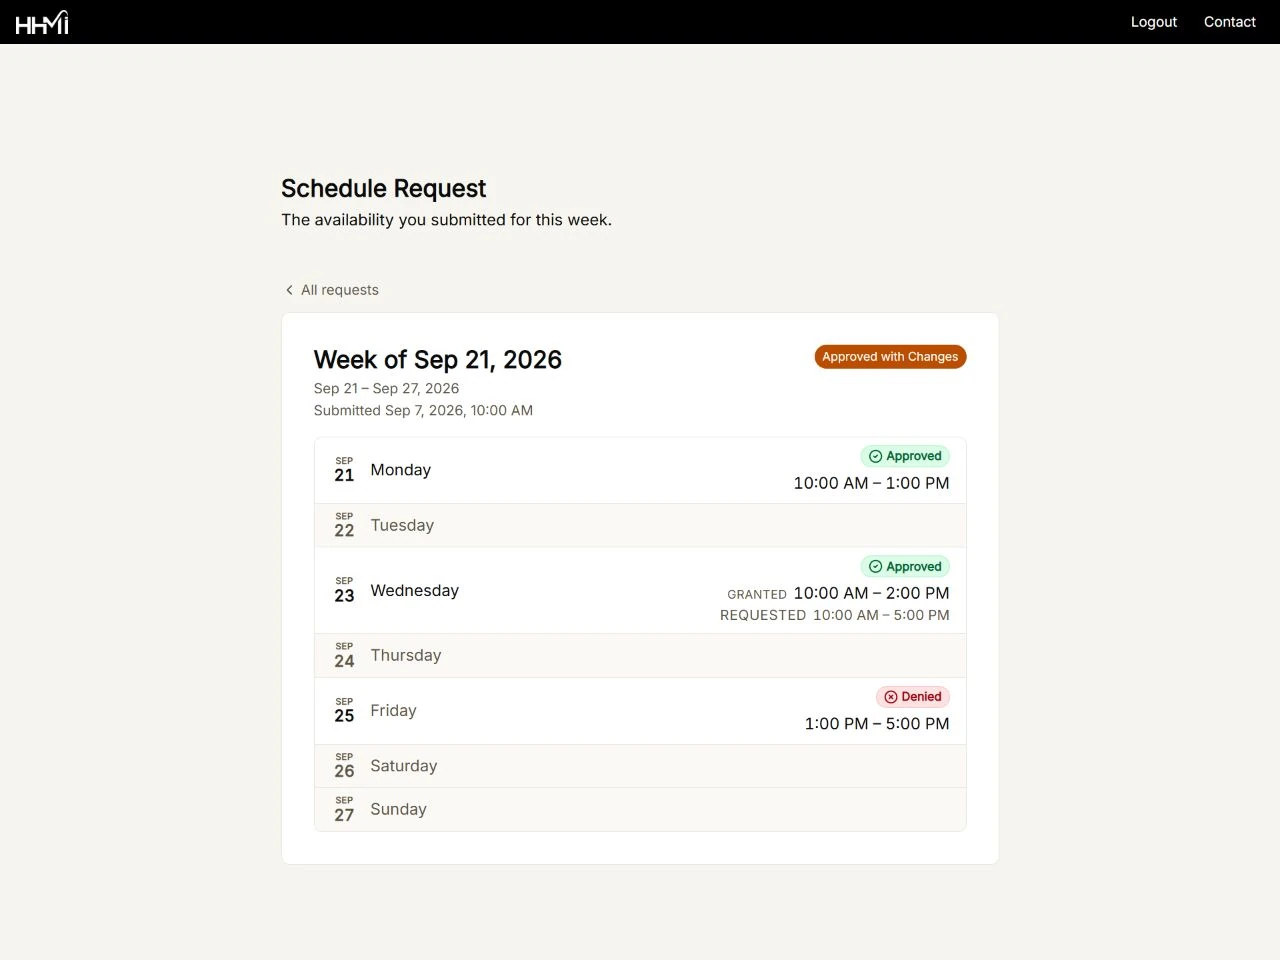
If you submit a denied or cancelled date again, the latest submission appears as the Current request. A View previous request disclosure lets you read the earlier attempt. Select All requests to return from a history detail page to the request list.
Help with a request
Create New Request is unavailable
Read the explanation near the button. Either every displayed date already has submitted or approved availability, or you do not have enough remaining schedulable time for the one-hour minimum. Check your pending requests and history before trying again.
The portal says some dates are no longer available
Another submitted or approved item now exists for at least one selected date. The portal does not send any part of that submission. Select Back to my requests to reload the current list, then create a request using the remaining available dates.
I did not receive a submission confirmation
Check your connection and reopen Schedule Requests to see whether the availability appears under Pending before trying again. If the error continues, contact Student Services with the dates you were requesting and the message you saw.
I need to change submitted or approved hours
The current portal provides a read-only view after submission. Contact [email protected] for a change or cancellation. You can also call 972-234-4224. Include the date and hours that need attention.
For instructions on viewing internship appointments in the mobile app, see the Healing Hands Student App guide.